Objective
Keeping a server up-to-date with the latest security patches and updates available for the operating system is always a good practice. This helps in protecting the server against any vulnerabilities that were present in the older versions of the operating system.
Ubuntu 20.04 LTS (Focal Fossa) is the latest Long Term Support release with the security patches and updates being available till 2025. Hence, upgrading an Ubuntu system with an older LTS version (18.04 LTS) to the latest version is always a good option.
This guide outlines the basic steps for upgrading an Ubuntu 18.04 LTS server to Ubuntu 20.04 LTS.
IMPORTANT NOTE: Always make sure that the server data is backed up first before proceeding with such upgrade processes as there are high risks of data loss during such operations.
Preparing for the upgrade process
1
Execute the below command to first check the version of Ubuntu installed in the server.
# lsb_release -a
2
The first step to being performed before proceeding with the OS upgrade is to update and upgrade the server packages.
Run the below command to update and upgrade the packages:
# sudo apt update && sudo apt upgrade -y
3
Reboot the server once.
# reboot4
Once the server is rebooted, run the below command to remove any unused packages and kernels.
# apt --purge autoremove
5
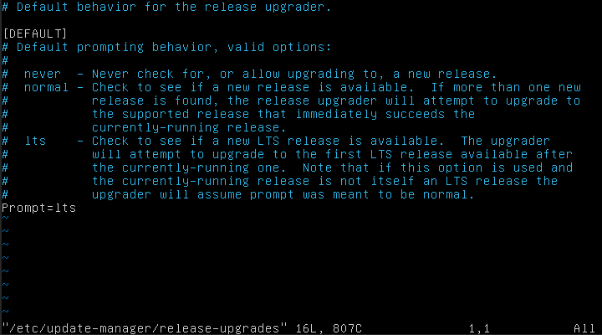
Using any editor of choice, open the update manager configuration file.
# vi /etc/update-manager/release-upgrades6
Running the upgrade process
Before proceeding with the OS upgrade process, make sure that the server data is backed up, as interrupting the upgrade process in between can cause the system to become corrupt and unstable.
1
In order to make sure that the upgrade process is not interrupted, it is recommended that this process be done through Console option of the server under Panel.
# do-release-upgrade2
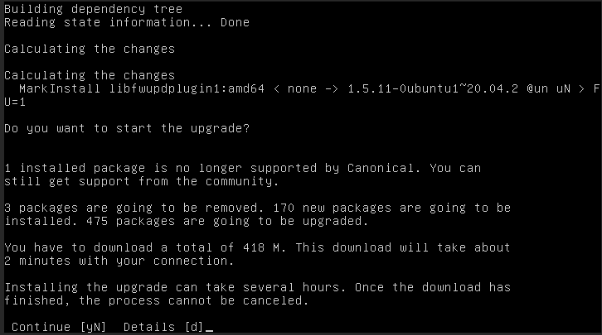
Type Y to proceed with the upgrade process:
3
The upgrade process will prompt for responses to be input for several questions such as below:
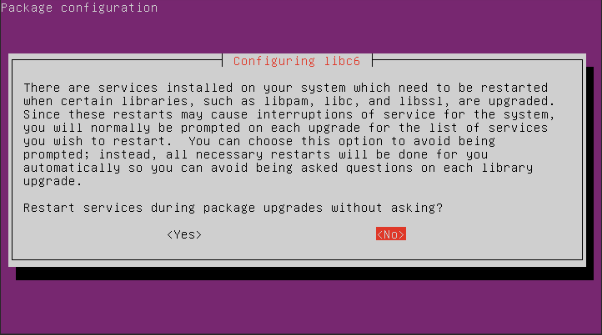
a) Restart services during package upgrades without asking?
Answer Yes: The services are automatically restarted during the upgrade process.
Answer No: Each service will be prompted to be restarted during the upgrade.
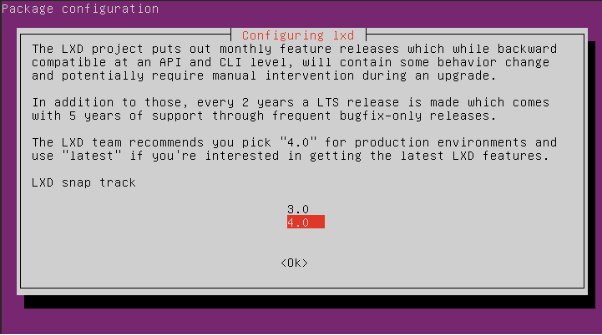
b) Configuring LXD
If not sure of which version is required, can select the 4.0 version:
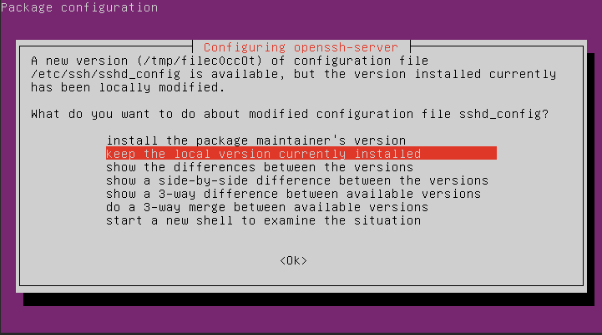
c) Configuring openssh-server
Select the option keep the local version currently installed:
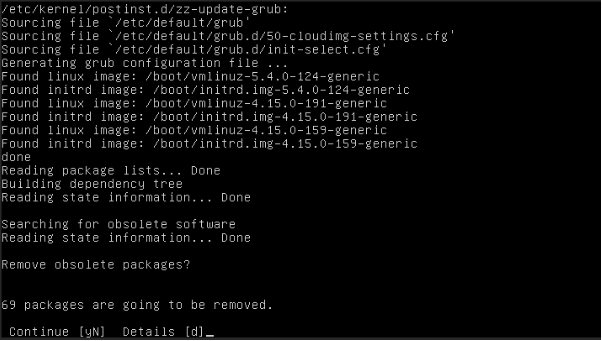
d) Remove obsolete packages
It is always recommended to remove the obsolete packages in the server to free up system resources. Type y to proceed:
4
5
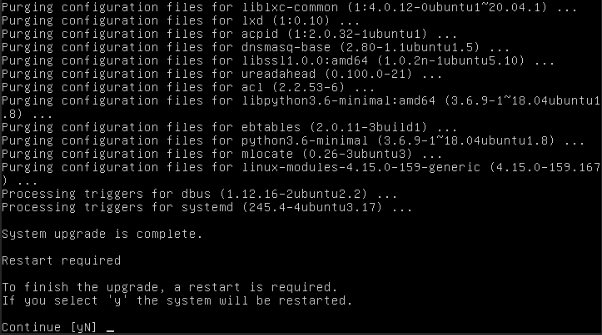
Once the server has been rebooted, log in as root and verify the completion of the upgrade process by checking the current Ubuntu version on the server.
# lsb_release -a

